Sunday, 24 April 2011

Another Messy Crafter

Afternoon folks I just wanted to share with you a fabulous tutorial on Sky created by Annika Ryan of 
Another Messy Crafter.  Its really easy to follow and the results are stunning..

Annika has also done a few more video tutorials so please visit her blog to find out more..


Hugs 
Tamara 

Saturday, 16 April 2011

Corner Bookmark Tutorial

Corner Bookmark 
Craft Supplies you will need 

  • Score board and score tool (I used the Houghie board)
  • Large Scalloed edge punch (mine is 3")
  • Edge punch or border die (I used Martha Stewart doily punch)
  • Pencil
  • Paper trimmer 
  • Double sided tape and glue
Craft Supplies you will need 

  • Score board and score tool (I used the Houghie board)
  • Large Scalloed edge punch (mine is 3")
  • Edge punch or border die (I used Martha Stewart doily punch)
  • Pencil
  • Paper trimmer 
  • Double sided tape and glue

Step 1
Card stock and Measurements
  • Card stock cut to 4" x 4" square (if you prefer you could make the square bigger or smaller)
  • 2x Squares cut to   2 ¾” x 2 ¾”  (cut one out of card stock and the other from your chosen design paper).
  • If you make your square bigger or smaller you will need to adjust your smaller square.  To do this just measure your diagonal score mark this will give you the size of your smaller square.
Step 2 


Mark three sides of your 4" square at 2 inches.

Step 3 


Score your lines from mark to mark


Step 4


The two smaller  2 ¾” squares, cut them both diagonal to end up with two triangles.. 


Step 5 


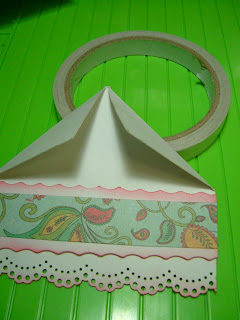
Use your punch or die to shape the bottom edge of the base of your bookmark..

Step 6


Using one of your design paper triangles, glue to the front. 

Step 7 & 9


Measure from the bottom edge of the triangle to the top edge of your shaped border. Cut a piece of card stock and decorate.  I used distressing inks to add some colour to my edges.

Step 8


Glue to the front and add ribbon.

 Step 9 


Follow step 8 this is for the back of your bookmark to hide the ribbon edges. 

Step 10 


Use double sided tape to secure the two flaps at the back.  Then add the other card stock triangle to hide the gap.  Decorate with the remaining design paper triangle.


Step 11


Add your die cut circle and scalloped edged circle and decorate.  For this bookmark I used a digital 

image from 


called "New Rosaline"

Add your chosen embellies and your finished.

NEW BLOG JUST FOR TUTORIALS

I'm setting up this blog to list all sorts of tutorials. As I'm finding it takes me ages to search for the information I might need for different projects. If you have a tutorial that you would like me to add here please get in contact. All I would do would be to list your tutorial, what it is and then a link to your blog/site.